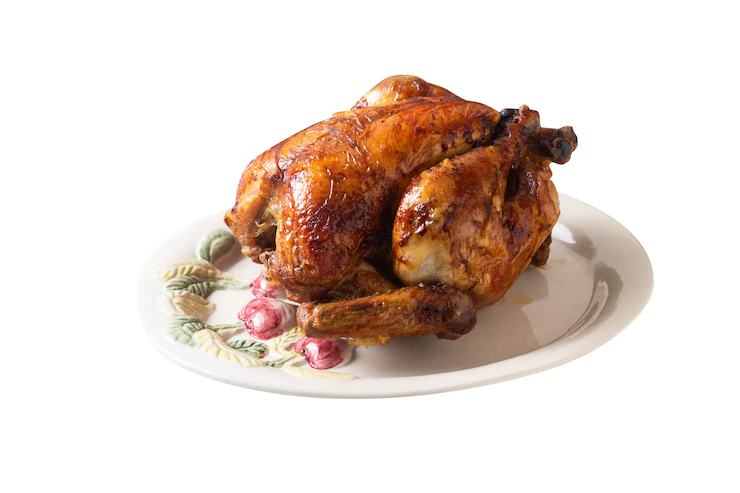
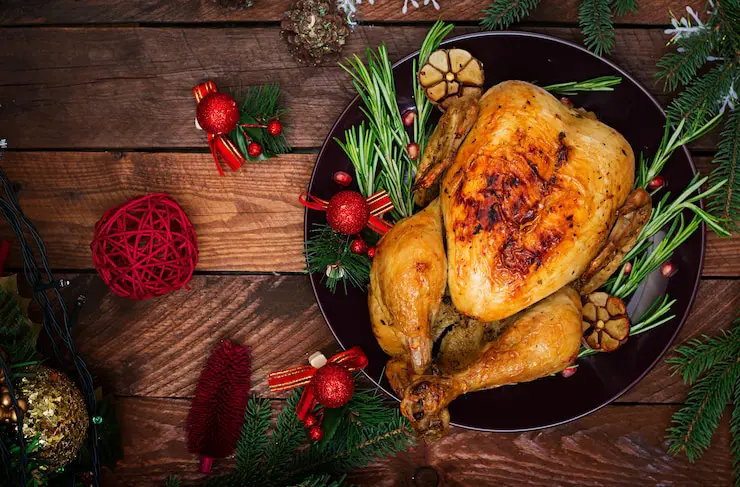
One of the best comfort foods globally is an excellent whole-baked chicken. When baking a whole chicken, make sure to choose one that is around three or four pounds and has been giblet-free. Also, be sure to pat the skin dry, and this will give the chicken crisper skin and a moister, juicier center. Place the breast side up in a roasting pan and brush it with melted butter and a few cloves of garlic.
Covering the chicken with aluminum foil for the first 30 minutes of cooking time is recommended when baking chicken. This will assist in maintaining the heat throughout the entire chicken and encourage the natural fluids to leak out of the chicken, allowing it to cook all the way through to completion.
How To Bake A Whole Chicken?
Before preparing your dish, you should wash and prep the vegetables. After washing the vegetables, you can mash and chop them. Add sage or thyme sprigs for flavor. You can add thyme sprigs to the oven if you have time to keep them fresh. This will also add a little zest to the dishes. You can bake your chicken the same day, or at least the same day.
The next step in the process is to prepare the pan. You can use a standard or non-stick pan. The oven should be preheated to at least 165 degrees Fahrenheit. Using a food thermometer is the safest method. To check whether a chicken is done, insert a digital thermometer. If it is not at this temperature, it may need another 20 to 30 minutes in the oven.
Once the chicken has been adequately prepared, it needs to be rested. The resting process will help the juices stay in the bird. Using a digital thermometer is the safest way to determine the doneness of the chicken. Always make sure to use a digital thermometer for a thorough check to avoid cross-contamination. Then, please take out the chicken and let it rest for 20 to 30 minutes. Then, cut the bag and bake.
Then, place the chicken in the oven. After one hour, cover the chicken with aluminum foil and bake it for another 30 minutes. Ensure that the internal temperature of the chicken is at least 165 degF. If you’re using a traditional oven thermometer, you don’t need to measure the bird’s temperature after the resting period. The chicken should be left in the roasting pan after resting to avoid cross-contamination.
After the chicken has been baked, you can add the veggies to the pan. You can also insert thyme or sage sprigs in the chicken cavity, which will give the chicken more flavor while roasting. The sage and thyme will also give the skin a more decadent, juicier appearance. When cooking a whole chicken, you should use a digital thermometer to ensure that the internal temperature is at least 165degF.
Once the chicken has reached the correct internal temperature, it should rest for 20 to 30 minutes. It is crucial to allow the chicken to rest to retain its juices. After the first half-hour, you can check the internal temperature with a food thermometer. When the chicken reaches 165degF, it is fully baked. If it is still pink after that, it will need to be cooked for another twenty or thirty minutes.
9 Tips For Baking Chicken
These methods will help you obtain flawlessly browned skin and juicy meat every time, no matter what roast chicken recipe you use.
- Roasting a chicken isn’t difficult, but it does necessitate some planning. Suppose you season your chicken a day or two ahead of time, whether with a dry brine, wet brine, or marinade; the salt will reach all portions of the bird. When this happens, the salt tastes the chicken and helps to keep it moist by changing the protein strands in the meat to hold more water.
- Brining your chicken in buttermilk, sour milk, or yogurt can help tenderize and flavor the flesh. Due to the sugars in milk, brushing clarified butter onto the chicken skin immediately before roasting will result in deeper caramelization.
- Aromatic oils should be massaged into the skin. Use your fingers to loosen the skin off the chicken breasts and thighs for more taste. Add herb butter, fresh herbs, or more marinade into these skin pockets to trap flavor between the meat and the skin.
- Separately prepare the stuffing. If you stuff your chicken, it will take longer to cook and result in an unevenly cooked bird. Cook the stuffing separately if you want to serve it with your chicken.
- Before roasting the chicken, temper it. Tempering food is a simple but essential process that entails bringing an ingredient to room temperature before cooking it to ensure even cooking. Tempering is crucial with most proteins, but it’s especially critical when roasting large chunks of meat in the oven since it allows the meat to cook more quickly.
- Get the chicken ready. Take the time to trim and knot your chicken before putting it in the oven. Remove the wingtips, which tend to burn, and tie the legs up to help the thighs brown. (Set them aside for stock.) If you choose to keep the wingtips, wrap them in aluminum foil or parchment paper, or tuck them behind the shoulders to keep them from burning. Some cooks choose to butterfly or spatchcock their chicken to lay flat on a baking sheet, which increases the chicken’s surface area, allowing for faster and more equal cooking.
- Place your chicken in the oven’s back corner. One technique to cope with the problem that different areas of the chicken cook at different rates are to use the fact that some parts of the oven are hotter than others; the back of the oven is usually hotter than the front. Place your chicken in the oven’s far back corner, with its legs pointing straight into the corner and its breasts pointing toward the middle. Switch the chicken to the opposite corner halfway through cooking to ensure that the left and right sides of the bird are uniformly done. (Keep the breasts pointing in the direction of the oven’s center.)
- Start hot and work your way down. Browning occurs at high oven temperatures, but overcooking occurs as well. Start your chicken in a hot oven to avoid this. Reduce the heat as the chicken begins to brown to retain the ideal temperature.
- Allow the chicken to cool. Carryover cooking refers to the fact that more significant portions of meat, such as whole chickens, continue to cook after they’ve been removed from the oven. Ten to twenty minutes should stay plenty for a three- to a four-pound bird.
How Long Should A Chicken Be Baked?
The short answer is that roasting a chicken in the oven takes about 70 minutes. The long answer is that the cooking time is determined by the temperature of the oven and the size of the chicken. An oven thermometer is the best technique to determine the oven’s actual temperature. Temperatures of 350°F to 450°F are ideal for roasting. If you’re using a convection oven, which employs fans to circulate the hot air, consider adjusting your oven temperature by 25°F, and check your chicken more frequently.
Larger chunks of meat, such as a whole chicken, take longer to cook, while bone-in portions, such as a whole chicken, require more time (the bones and the sheer size create insulation, which slows the cooking down). Even if your oven is set to the highest setting, a giant chicken will take longer to roast than a tiny one, so keep that in mind.
How To Tell If A Chicken Is Ready To Serve?
There are a few ways to tell if your chicken is done:
Thermometer
Stick a thermometer in the center of the breast and the thigh if you have a digital instant-read thermometer or a meat thermometer. It should be 160 degrees Fahrenheit, and the thigh should be slightly hotter than the breast.
Leg wiggle
Give one of the legs a wriggle to see if your chicken is done without using a thermometer. It should be able to move around freely and simply separate from the rest of the bird.
Juice test
Stick a knife into the thigh for a juice test. If the juices from your chicken run clear, it’s ready to eat.
5 Steps To Carving A Baked Chicken
Once you’ve roasted a chicken and let it rest, it’s time to carve.
Drain The Juice
Juice gathers in the pan and the chicken cavity as it cooks. Carefully spoon the juice from the cavity into the roasting pan with tongs. (The juice can be poured into a gravy boat and served with the chicken later.) To begin carving, place the chicken on a cutting board (a grooved wooden cutting board is preferable).
Remove The Legs
Make your initial cut at the point where the chicken’s leg meets the body. Use a fork (or carving fork, if you have it) to hold the bird’s breastbone while you slice into the skin between the leg and the body. Wiggle the leg a little to expose the hip joint, then use the point of your knife to cut the joint. Rep on the opposite side.
Separate The Drumsticks
Use your fork to stabilize the thigh with the leg skin down the cutting board. Cut between the thigh and the drumstick with your knife, piercing the joint between the thigh and the drumstick. Rep with the opposite leg.
Remove The Breasts
Your fork should be anchored in the breastbone. Make a diagonal cut from the top of the breast to the bottom with your knife next to the wing. Rep on the opposite side. Cut along the breastbone with your fork in the breast flesh. You may separate each breast from the ribcage by angling your knife downward and away from the breastbone. The breasts can be served whole or sliced.
Remove the wings
Pull each wing away from the body one at a time and cut through the wing joint. Keep the carcass after you’ve cut your chicken into ideal serving pieces. While the carcass is still warm, shred any meat for tacos or chicken salad. Any bones, skin, or cartilage leftover can be used to make delicious chicken stock.
Conclusion
To check if a whole chicken is done, insert a meat thermometer into the thickest part of the breast, and insert it into the cavity. The chicken is done when its internal temperature is 165 degrees Fahrenheit. It is important to remember that the temperature will continue to rise after the chicken is removed from the oven, so it should be at least 165 degrees. To check if the chicken is done, use a digital thermometer. If the meat is still pink when you remove it from the oven, it needs to cook for another 20 to 30 minutes.
You can place the drumsticks and thigh in a roasting pan and wrap the chicken in the drumstick. As long as you do not put the chicken in a roasting pan, it would be best to wait until the chicken is thoroughly cooked.