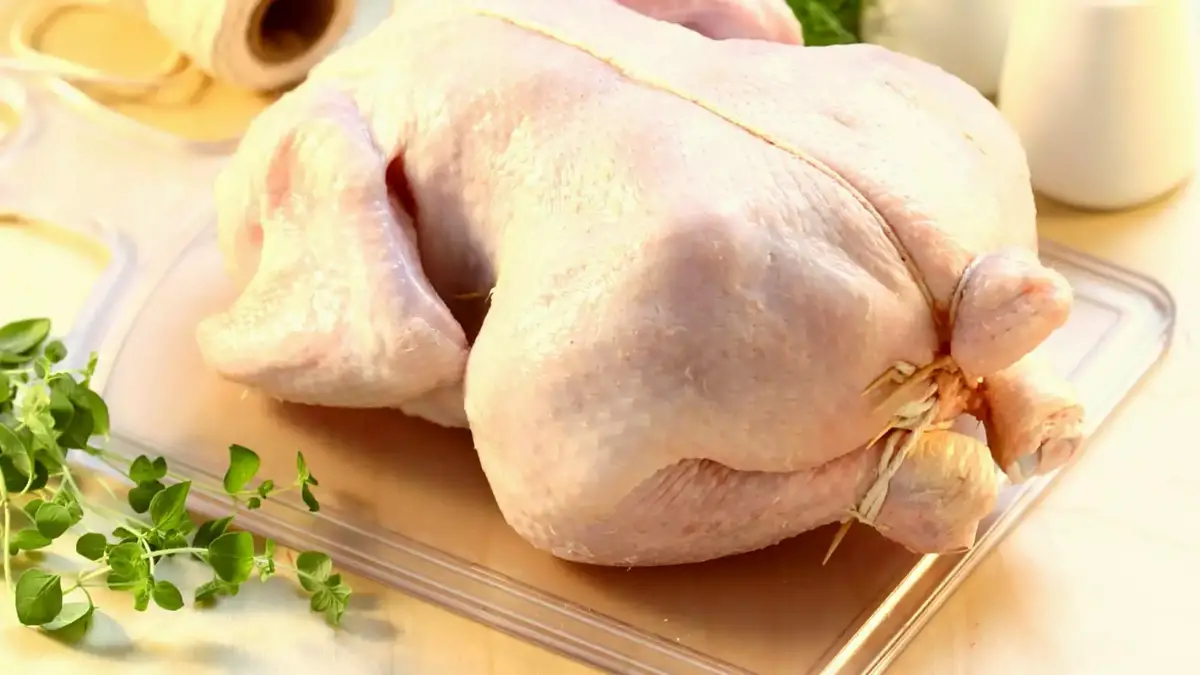
The overall quality of your roasted chicken will improve if you learn how to truss a chicken. Trussing ensures even cooking, and there’s something special about a perfectly roasted chicken. The finished product is golden brown with crispy skin and a super moist texture.
Before cooking, truss the chicken to keep it in shape and ensure it cooks evenly, resulting in tender leg meat and juicy breast meat. Trussing a chicken takes less than a minute, and the same technique can be used to truss any poultry or game bird.
It only takes a few seconds to truss a chicken, but it’s well worth it. It aids in the preservation of the chicken’s shape and ensures that it cooks evenly. Please spend a few seconds trussing your chicken before roasting it to ensure it cooks evenly and maintains its shape. There are several more elaborate trussing methods, but we prefer this simple two-step method because it is quick and practical. Kitchen twine is all you’ll need. Look for cotton twine made specifically for cooking.
What does Trussing a Chicken Mean?
Trussing a chicken means tying the wings and legs of the bird to the body with kitchen twine. Chefs used to truss chickens before roasting them to keep them presentable and ensure that they cooked evenly. However, trussing is even more important when using a spinning rotisserie for cooking the chicken. The legs and wings of the chicken must stay close to the body during rotisserie cooking to avoid hitting the heating elements or becoming stuck on anything. Trussing keeps the chicken compact in the oven, so it spins easily and cooks evenly. Let’s learn how to do it because it’s the only tricky part of making a rotisserie chicken.
How to Truss a Chicken?
Here are the steps to truss a chicken:
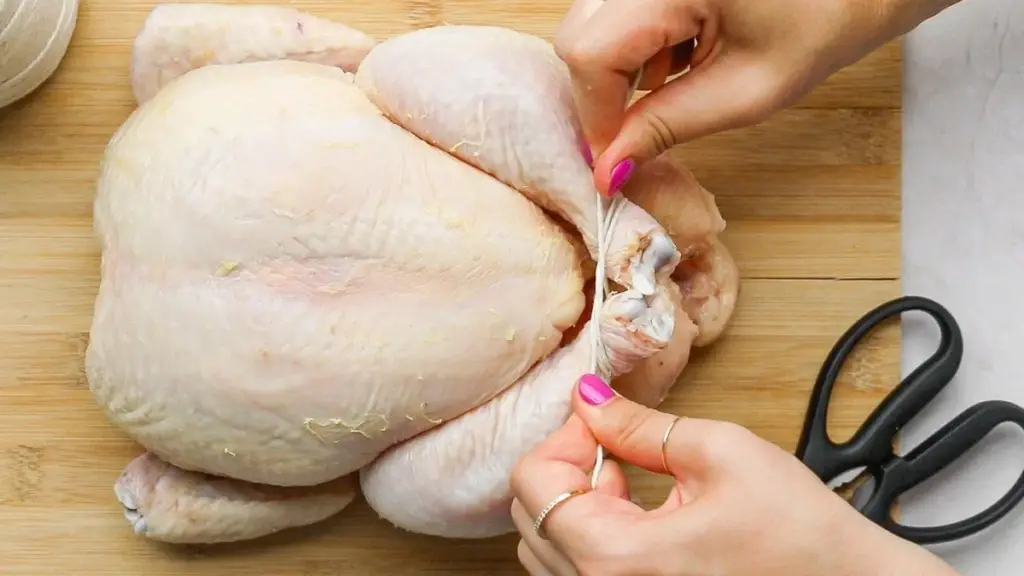
Step 1: Securing the Legs
The first step is to secure the legs together. The images above walk you through these steps:
- Start with four lengths of kitchen twine – that’s twine that spans the neck to the tail four times.
- Place the chicken with the legs facing you.
- Start with the twine underneath the back of the chicken, midway between the head and the tail.
- Bring the twine down between the legs and the breast, and then cross the string under the crown of the chicken (the bottom of the ribcage).
- Twist the twine around each of the legs and bring the legs together.
Step 2: Securing the Tail
Next, we’ll secure the legs to the tail to keep them tight and in place.
- Bring the twine down on either side of the tail.
- Flip the chicken over so that it is resting on its breast.
- Cross the twine around the tail and pull taught.
- Wrap the twine around itself twice (rather than tying a knot) and flip the chicken over onto its back.
- Bring the twine up on either side of the chicken over the wings.
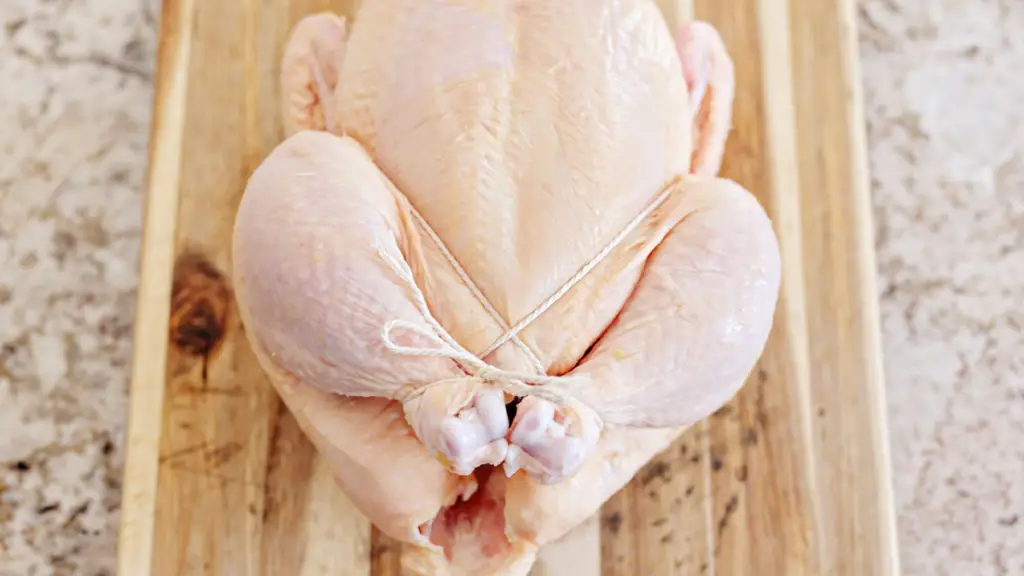
Step 3: Securing the Wings
After we’ve secured the legs and tail, all that’s left is to secure the wings, tucking them as close to the body as possible. The goal is to tuck the wing tips between the thighs and the breast rather than having them rest directly on the breast. The breasts can brown evenly without being obstructed by the wings.
- Once the twine is resting over the outstretched wing, bring it out and back down towards the leg. Doing this should wrap the twine around the wings.
- Tuck the wing tips into the space between the thigh and the breast and cross the twine underneath the crown of the chicken (the pointed bottom of the ribcage).
- Tie the twine in a knot securely under the crown.
- Trim off any leftover twine.
Step 4: Placing the Chicken on the Spit
It’s just a matter of placing the chicken on the rotisserie spit. Begin by securing the tines to one end of the spit. Slide the spit from your neck to your legs, making sure the other end of the spit passes through the gap between your legs and tail. Insert the spikes into the chicken base with the second set of rotisserie tines on the spit.
Why Should you Truss a Chicken?
By tucking the wings and legs into the chicken’s body, you’re creating a nice little package that allows all of the chicken parts to cook evenly. The wings will not burn, and the more uniform shape will help insulate the breasts, preventing them from overcooking and drying out. Plus, your roasted chicken will be gorgeous and picture-perfect when you take it out of the oven.
When you truss a chicken, it’s much easier to keep the wings and legs from burning. When you don’t trust your chicken, the cavity in the breast can remain open, allowing too much hot air to circulate inside. This causes the breast to dry out before the thighs and legs are fully cooked.
What to Use if you Don’t have Kitchen Twine?
Kitchen twine is handy to have on hand for trussing a chicken or turkey, securing a stuffed loin, or tying off a packet of herbs, but it’s not a must-have item in the kitchen. If you don’t have any kitchen twine on hand, a few alternatives will suffice in a pinch.
Substitutes for Twine
- Dental floss: Tie or bundle your bird with dental floss, and it’ll keep everything together just as well as twine. Use plain, unwaxed floss to avoid flavoring your food with mint or risk melted wax igniting in the oven. Consider keeping a roll of floss in one of your kitchen drawers; it cuts soft cheeses better than a knife, such as a goat cheese.
- Aluminum foil: Roll some aluminum foil into tight ropes and use them as bands to secure your food. Aluminum foil is best for trussing stuffed meats that aren’t going to unroll; it won’t be strong enough to truss a turkey or chicken.
- Toothpicks or wooden skewers: Poke toothpicks or wooden skewers into the rolled meat to keep the seam from unraveling. To prevent them from catching fire in the oven, soak them in water first (like you would when grilling). If you use toothpicks, it’s good to keep track of how many you used so you know how many you’ll need to remove after cooking. You don’t want anyone munching on a piece of wood by accident.
- Nothing at All: Consider going without if you don’t have any of these items. To keep the wingtips from burning, leave your turkey untrussed and tuck them under the bird or wrap them in aluminum foil. Place the loin seam side down on the baking sheet so that the weight of the meat holds it together. If you need to secure a bundle of herbs, place them in a piece of cheesecloth and tie a knot with the corners.
A Warning About Other Substitutes
Some people suggest using rubber bands, embroidery floss, crochet thread, or sewing thread as a substitute for kitchen twine. Rubber bands are a bad idea because hot rubber should never be near food, and the other suggestions should be used with caution. Embroidery floss and thread are flammable and could catch fire in your oven. Kitchen twine, on the other hand, falls into this category.
If you use any of these, soak the thread/floss first to make it less likely to catch fire, and make sure your oven rack is adjusted, so your twine substitute doesn’t come too close to the heating element. It’s worth noting that colored thread can give your food a unique color. If you decide to use any unusual twine substitutes, proceed with caution. Keep an extinguisher on hand, and don’t leave your oven unattended.
Conclusion
Trussing a chicken is an important part of the roasting process. Trussing a chicken means tying it up tightly with kitchen twine, so the wings and legs stay close to the body. This compacts the chicken, allowing it to cook more evenly. Trussing a chicken also prevents the tips of the wings and drumsticks from burning and improves the appearance of the cooked chicken when served.
Aromatics such as a halved onion, citrus such as a halved lemon or orange, and fresh herbs are recommended for stuffing the chicken. You’ll need to do this before you start trussing the chicken because once the legs are tied back, you won’t be able to get anything inside.