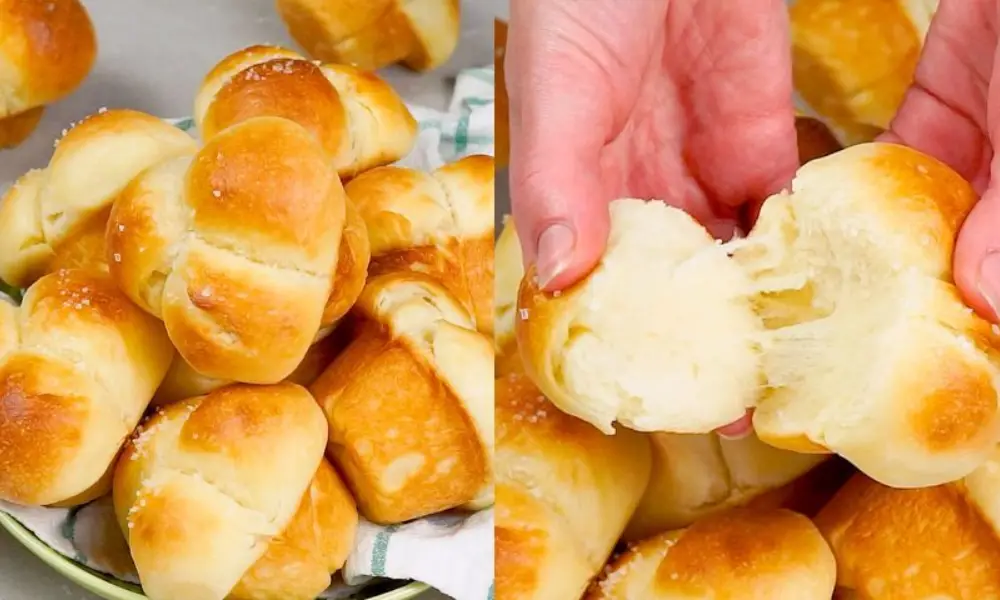
These Cloverleaf Rolls are buttery and fluffy. These are created with milk dough, which is incredibly tender and has a texture similar to clouds. Home-baked bread, including pita bread, focaccia bread, banana bread, and more, is cozy. Buttery and pillow-soft Cloverleaf rolls are made with milk dough, which is incredibly delicate and fluffy. Soft, buttery, and given an extra boost with kosher salt. Simply put, our cloverleaf rolls are the greatest.
These homemade cloverleaf rolls are delicious and incredibly adaptable. They are fluffy, buttery, and slightly sweet. They can be pulled apart so that more interior edges hold all of the melted butter. This is ideal with a bowl of potato soup on a cool day. Any dish, whether savory or sweet, goes well with them. With some butter and jam, it can be had for breakfast or dinner.
What is Milk Bread?
The traditional bread that produced delightfully crisp grilled cheese sandwiches before sourdough ever became popular is so soft and airy that it almost gives way when you press down on it without being toasted.
White bread, called milk bread, has a soft crumb and a deep buttery flavor since it is cooked with milk, egg, and butter. We prefer milk bread dough for making cloverleaf rolls since it has the most gratifying texture and is simple to prepare.
What are Cloverleaf Dinner Rolls?
An American-style bread roll with three distinct parts is known as a cloverleaf roll. It was given its name after the three-lobed clover plant leaf. Three tiny balls of dough are used to make them, and the cloverleaf pattern is created when the dough bakes and proves. Dinner buns made of cloverleaf are a timeless favorite. They are elevated from their delicate, buttery texture with a dash of kosher salt.
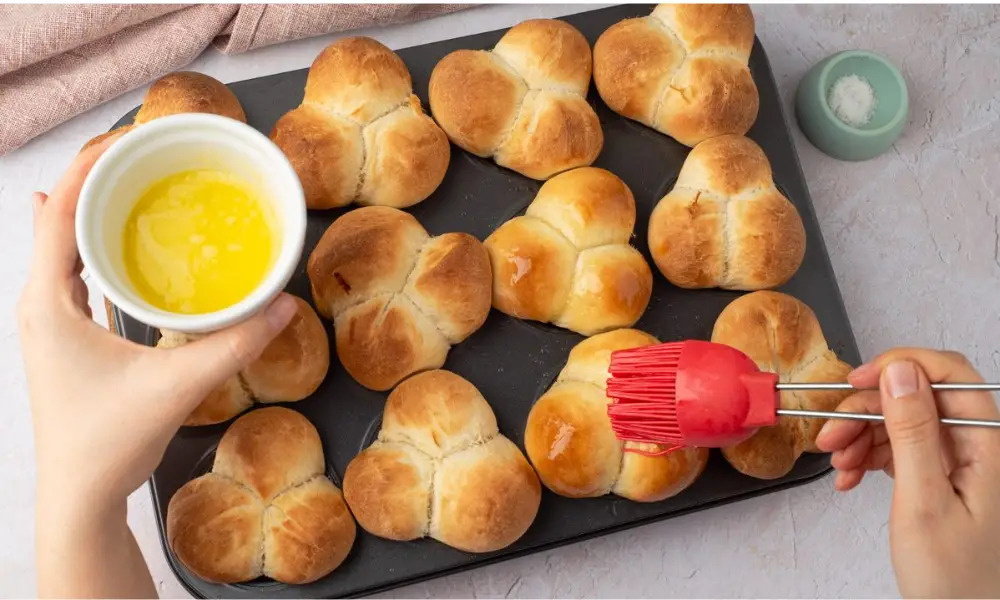
These cloverleaf-shaped dinner rolls are ideal for serving potato chowder or chili and are made with our dependable Amish white bread dough. Making them is simple. To create the clover shape, three tiny dough balls are crammed closely together in muffin cups. Once baked, the clover shape makes it simple to tear apart the rolls into thirds.
How to Make the Softest Cloverleaf Dinner Rolls?
Roll recipes can be used to create cloverleaf dinner rolls. Use the dough from our recipe for knotted rolls if you like milk bread (rolls made with milk and eggs). We have a terrific Amish white bread recipe that employs only the most fundamental ingredients and is fluffy and light.
Rolls should be gently covered with nonstick cooking spray-coated plastic wrap after being shaped and put into the muffin tray. Rolls should be covered and stored in the fridge. Pull out the rolls a couple of hours before baking and let them sit on the counter until they are room temperature and slightly puffed up. As indicated, bake.
Ingredients:
Rolls of Cloverleaf:
- Three tablespoons (115°F) warm water,
- 2 1/4 teaspoons of active dry yeast (1 packet of yeast)
- 1 cup warm (105-110 °F) low-fat milk
- Five unsalted butter, melted or extremely soft, plus extra for the pan.
- Three tablespoons of granulated sugar
- One big egg, temperature-controlled,
- One teaspoon of fine sea salt
- 3 1/2 cups split bread flour (plus an additional 1/4 cup if necessary)
As for the Topping:
- 1/tsp of kosher salt
- Three split tablespoons of unsalted butter, melted.
Instructions:
- To the pan of a stand mixer, add 3 Tbsp of 115°F, extremely cozy water. One packet of yeast should be sprinkled over the top, mixed, and left uncovered for 7 minutes or until frothy.
- Add the melted butter, sugar, egg, salt, and warm milk. When everything is well combined, whisk in 2 cups of flour gradually. Next, Change to the dough hook attachment and gradually add the last 1 1/2 cups of flour, letting each addition blend thoroughly before continuing. When the dough feels moist to the touch but doesn’t stick to clean, dry fingertips, gradually add more flour.
- Turn the dough to cover it with oil as you transfer it to a greased basin. Wrap the pan in plastic wrap and set it aside to rise for 1 to 1 1/2 hours, or until the volume has doubled, in a warm location (90 to 100 °F).
- Place the dough on a spotless work surface. At this stage, you shouldn’t need any more flour. Divide the dough into 1-2 pieces and cut each into three pieces. Roll the little bits into balls by placing your palm over each one and doing so over the work area. Three tiny dough balls should be placed in each muffin cup of a 1-2-count pan after it has been greased.
- A rack should be placed in the center of the 425° preheated oven. Place the rolls on the greased side of a plastic wrap sheet, covering them loosely. 30 to 45 minutes of visible puffing should result from resting in a warm environment.
- After the rolls have risen, spray the tops with two tablespoons of melted butter and bake for 13 to 15 minutes at 425 degrees Fahrenheit or until golden brown. Brush with extra melted butter and season with kosher salt as soon as they come out of the oven. After 15 minutes of cooling, transfer to a wire rack and serve warm.
Is it Possible to Switch between Instant and Active Dry Yeast?
Most frequently, the instant yeast from Sam’s Club comes in a big package. I extend the rising time by 10 to 15 minutes when I use active dry yeast. Although dried active yeast, not quick yeast, requires. You can use proving both instant and active dry yeast interchangeably in recipes. Just remember to activate it in a liquid! The rise time will be a little longer if you use active dry instead of RapidRise or instant yeast.
Use roughly a 25% reduction when using instant (or rapid rise) yeast in place of active dry. For instance, use 1 3/4 teaspoon of instant yeast if the recipe calls for one packet or 214 teaspoons of active dry yeast.
Furthermore, you can add the yeast to the dry ingredients without first proofing it. The yeast used in this recipe, which is active dry yeast, performs well. Instant yeast will function, but the texture won’t be precisely the same, and the rising process will be sped up. Most of the time, I use whatever yeast is on hand.
How can I Make Soft, Fluffy Bread?
Brush melted butter on your baked bread to keep a nice crust. Yeast ferments the sugar in the dough, creating carbon dioxide as a byproduct. The CO2 that the yeast produces fills the dough and expands it. The bubbles in the bread pop after it is done baking, leaving a fluffy, light loaf behind.
If you add a little milk or use all the milk in the recipe instead of water, the bread will be softer, fluffier, and richer and will probably last a little longer. Use a dough enhancer like Vital Wheat Gluten to make your bread fluffier. A significantly lighter and fluffier outcome can be achieved with just a fair bit of dough enhancer per loaf. When yeast eats the flour’s sugars, it produces gases.
By creating a mesh with the gluten, these gases are contained within the dough. Your bread gets its airy, fluffy texture from this. By kneading the dough, this mesh is created. All the bubbles that cause holes in bread and make it lighter and fluffier are caused by carbon dioxide. Because gas is produced from yeast development, your bread loaf will be lighter and airier the more yeast grows in the dough.
What Type of Flour is the Best for Making Bread and Rolls?
Usually, I make do with what I have (bread flour or all-purpose flour). The ideal flour to use is bread flour since it contains more protein, which aids in the development of the gluten in the dough and produces softer dinner rolls. The higher protein content of bread flour, which generates gluten, makes it excellent.
For this recipe, you can either use bread flour or all-purpose flour. Most people prefer all-purpose flour, while bread flour yields chewier dinner rolls. Finely ground soft white wheat is ideal for supple, airy baked items, including pie crusts, pastries, cookies, bread, and buns.
High-protein flour made from hard spring wheat is called bread flour. The flour’s high protein content, which gives yeasted bread structure and flexibility, makes it predominantly used for baking bread. (All-purpose flour includes nine to eleven percent protein, compared to 10 to 13 percent in bread flour. Because of its high protein level, Bob’s Red Mill’s Artisan Bread Flour is perfect for making pretzels, bagels, sourdough, rustic loaves, and other types of bread.
Can Cloverleaf Dinner Rolls be Frozen?
Dinner rolls can be frozen; if you do so the day after baking them, they will taste better when thawed. Take as many rolls as you need out of the freezer the day before serving; set them in a pan, and allow them to thaw/rise for about 4 to 5 hours. Then, freeze them in a pan.
Once frozen, store them in freezer-safe bags. As if you were serving the rolls straight away, continue to bake the rolls as usual. Then, tightly wrap them in aluminum foil after allowing them to cool completely. Up to a month can be spent freezing the foil-wrapped box before even well-wrapped bread develops frost and freezer burn.
Place the package in a freezer bag or storage container. If purchased in a plastic bag, it will protect the bread for a few weeks. Put the product in the freezer right away. Rolls or buns, To freeze rolls or buns, move them into a zip-top freezer bag, compress the air, and then firmly seal the bag. They will remain safe after around three months while maintaining their greatest quality if stored properly. Dinner rolls that have been consistently frozen at 0°F will keep safe indefinitely; the freezer time indicated is solely for the highest quality.
Conclusion
Sometimes all you need is to smear on some whipped honey butter or cranberry sauce, but if you want to serve this with a meal, here are some of our favorite dinner roll recipes. Roasted sweet potato salad, creamy tomato soup, chicken pot pie soup, sweet potato soup, vegetable soup with cabbage, and soup. Golden, buttery, and incredibly soft. To activate the yeast and ensure it is still active, combine it with 3 Tbsp of warm water at the beginning of the recipe.
After around 7 minutes, if you don’t notice a frothy layer on your mixture, you should buy new yeast and start over. The dough should be in a warm environment of at least 75°F but not more than 110°F (high heat will kill your yeast). It works wonderfully to bake it with the light on. Additionally, you might reheat a damp kitchen towel in the microwave for a minute before turning it off and setting the bowl of dough within. For dough proofing, the warm, steamy environment is excellent.