Homemade chocolate bars are simple to create, and with only a few ingredients, you can have your favorite chocolate bars in minutes. Learn how to make chocolate bars with milk chocolate and your preferred toppings. Make them unique and give them as gifts! It would be best to start with great chocolate to make good homemade chocolate bars because this is all about the chocolate.

Handcrafted chocolates are glammed up for gifting with some attractive packaging and personalized gift tags, and they’re made with only a few ingredients and a short prep time. I can’t wait to show you how to create these easy and delicious chocolate bars, the perfect present.
What Is the Chocolate Bar?
A chocolate bar (Commonwealth English) or candy bar (particular American English dialects) is a chocolate-based confection that may include layerings or combinations of nuts, fruit, caramel, nougat, and wafers. There are many different chocolate bar brands available. A Snickers bar, which comprises nougat combined with caramel and peanuts wrapped in milk chocolate, is a famous example.
In 1847, J. S. Fry & Sons of Bristol, England, produced the first solid chocolate bar, and Cadbury started making them in 1849. In 1866, Fry’s Chocolate Cream, a filled chocolate bar, was introduced. The Goo Goo Cluster, which comprised marshmallow, nougat, caramel, and roasted peanuts, was the first mass-produced combo bar in 1912.
How to Make a Chocolate Bar at Home?
Making chocolate bars at home is easy! Now you can make homemade candy bars and top them with all your favorite ingredients.
Ingredients
These homemade chocolate bars are almost self-contained. You’ll be good to present all season long with just two ingredients and a set of affordable silicone chocolate molds.
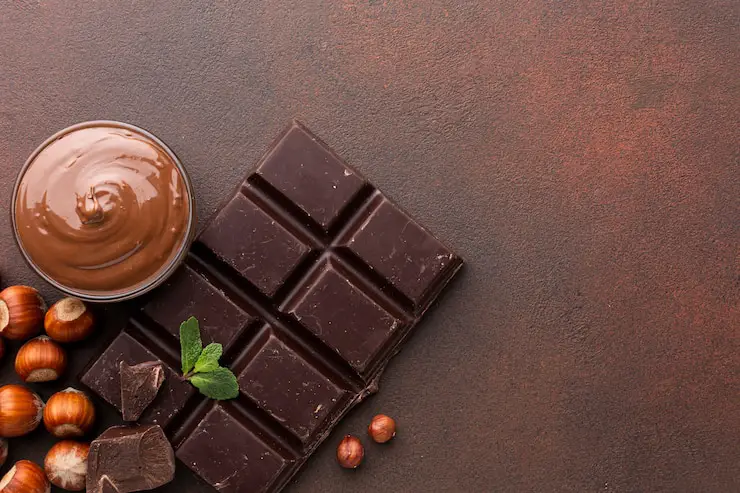
Chocolate. These DIY chocolate bars can be made with dark, milk, or white chocolate. Let your sweet tooth do the talking! For best results, use good quality chocolate. Chocolate bars are best as chocolate chips often have a waxy coating that isn’t ideal for melting. I love Valhrona, Guittard or Ghirardelli.
Mix-ins. To decorate these homemade chocolate bars, use your favorite toppings. My favorites are mini peanut butter cups, peppermint candy, chopped peanuts, toffee, cacao nibs, salted caramel, and crushed Oreos. The options are unlimited, so pick your favorites and mix & match till you’re satisfied!
Chocolate bar silicone molds. You will need a set of silicone chocolate molds to make these homemade chocolate bars. Just pour the melted chocolate into the molds, chill, and release. It’s that easy!
Steps to follow
Here are some steps to follow:
1. Melt the Chocolate
Set up a double boiler over medium-low heat to melt the chocolate. Bring the water to a low simmer, making sure the bowl above it does not contact it. Stir in the chocolate until it is smooth and shiny. Remove the bowl from the heat and place it over a hot kettle of water to keep the chocolate from setting while you work. Follow the instructions here if you like to temper your chocolate. Untempered chocolate is more prone to melting at room temperature, but if you’re snacking on these chocolate bars at home and giving them away in a few days, it’ll suffice. If you’re sending these chocolate bars to a distant location or reside in a hot environment, tempering the chocolate is a good idea.
2. Pour Melted Chocolate Into Molds
Pour the chocolate into clean, dry silicone molds with a spoon or measuring cup once it’s completely melted and smooth. Fill only to the top line of the mold and smooth the tops with an offset spatula.
3. Add Toppings and Chill
Now it’s time to have some fun! Before the melted chocolate begins to solidify, add any desired toppings. It only takes a tablespoon or so. A couple of my favorite taste combos are listed here. This is a treat where you get to choose your adventure, so go with your instincts and make the best homemade chocolate bars you’ve ever had.
- Dark Chocolate Toffee
- Milk Chocolate Peanut Butter Cup
- White Chocolate Peppermint
- Milk Chocolate Peanut
- Dark Chocolate Salted Caramel
- Milk Chocolate Mint Oreo
- White Chocolate Macadamia Nut
The list might go on forever. Cacao nibs, nuts, rocky road, freeze-dried strawberries, and chopped pistachios are other options. Make your favorite candy bar your signature candy bar, or develop some new flavor combinations that everyone will enjoy.
Step 4: Remove Bars From Molds and Wrap
Allow the bars to sit at room temperature for about 10 minutes after adding the toppings. Leave the molds on a baking sheet and place them in the refrigerator for 20 minutes. Chill for a few minutes more if the chocolate is still soft or sticky to the touch. Remove the bars from the fridge and peel the molds away from the chocolate with your fingers. If the chocolate is appropriately set, it should be able to separate effortlessly. You’re now ready to wrap!
What Chocolate To Use to Make Homemade Chocolate Bars?
Here is the chocolate to use to make homemade candy bars:
Pure Chocolate
- Pure chocolate contains cocoa butter that melts at body temperature, giving the chocolate a luxuriously smooth texture when it melts on your tongue.
- You can purchase pure chocolate bars, blocks called (they look like chips but are not), pistoles, and chips.
- The flavor is decadently rich and delicious.
- When pure chocolate is in its temper, it has a beautiful snap and shine.
Compound Chocolate
- Compound chocolate, also known as Confectionery Coating, Candy Melts, Almond Bark, or Melting Wafers, contains vegetable oils, usually palm kernel oil. They do not contain any cocoa butter.
- Some people refer to this as fake chocolate.
- This chocolate is easy to melt and will make shiny candy bars with a good snap without fuss.
- You melt the wafers in the microwave or using a double boiler, and they are ready to use.
- The flavor is not nearly as lovely as pure chocolate made with cacao butter, but it has a good flavor. I particularly like using white compound chocolate to make many treats, including my Candy Cane Chocolate Cups.
What Are Homemade Chocolate Bar Flavors?
Here are the flavors of the chocolate bar:
Crunchy Mint Chocolate: Add a few drops of pure peppermint extract to the melted chocolate. Feel free to add cacao nibs or crispy rice cereal for a fun texture.
Dark Chocolate Almond: Stir a handful of chopped almonds with the other ingredients. This can also be done with diced walnuts, peanuts, or cashews.
Chocolate Coconut: Stir in a handful of shredded coconut, or sprinkle it over the top before chilling the chocolate bars.
Chocolate Sea Salt: After pouring the melted chocolate into a container, sprinkle a small amount of sea salt on top.
Rocky Road: Add mini vegan marshmallows and chopped nuts of choice to the mixture before refrigerating or freezing.
Peanut Butter Swirl: After pouring the chocolate into a container, use a spoon to swirl in melted peanut butter or almond butter. Chill until firm.
Espresso Chocolate Bars: Stir 1/8 tsp instant coffee granules with the cocoa. You can increase this amount as desired for a more robust coffee flavor.
Other flavor ideas and add-ins include chia seeds, hemp seeds, freeze-dried strawberries or bananas, dried blueberries, crushed pecans or pistachios, a pinch of cayenne, and rainbow sprinkles. The possibilities abound!
Conclusion
Homemade chocolate bars are a lot of fun to create since you can make them any size you want and fill them with any bits, spices, nuts, seeds, and other treats you have on hand. The options are limitless. Make a few, wrap them in gold foil candy paper or parchment paper, and store them in a drawer for the month.
Everyone seems to have their method, but I usually start with the most excellent dark chocolate and add as many additives as possible. You can either smear the mixture across a parchment-lined baking sheet or let it set in a mold (or ice cube tray) of your choice to form your bars. Experimenting should be enjoyable.