In order to make your own gravy with flour and milk, you should know how to prepare this simple dish. Ensure that the butter and flour are thoroughly incorporated before adding the milk, whisking to prevent clumps, and bringing to a low boil. This recipe is one of the easiest ways to make your favorite gravy at home. You can’t resist having biscuits or mashed potatoes with delectable white gravy for breakfast. It will be at the top of your list of all-time favorites. The way we feel about white pepper gravy is beyond words.
White gravy is a wonderful accompaniment to many main dishes since it is silky and creamy. Fried chicken fingers with mashed potatoes and white gravy are a favorite in every family. We think we could eat a big bowl of gravy. White gravy is a fantastic breakfast option.

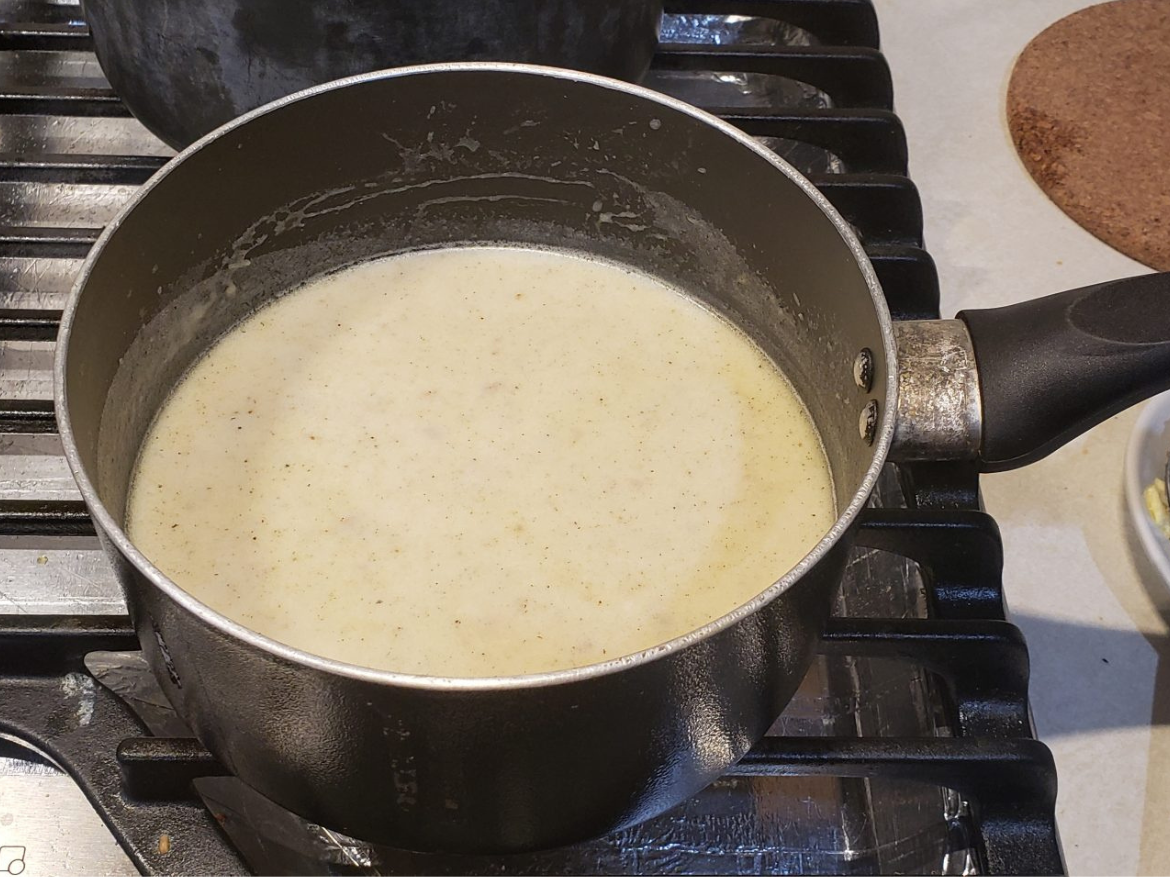
Here’s a Guide for Making White Gravy
How do you Make Homemade Gravy?
The good news is that you may now enjoy this simple milk gravy recipe with flour wherever you are from (it’s no longer just for the South). This gravy tastes fantastic with chicken strips, biscuits, mashed potatoes, and chicken-fried steak! White gravy is a must because when you’ll serve homemade fried chicken strips to your family with mashed potatoes for dinner. You won’t repurchase the packaged brown gravy mix. You will begin producing your own white gravy, though, once you will discover how simple it is to do so. We had anticipated discussing how to make white gravy from stuff in your cupboard today. You won’t believe how simple this dish is!
What’s in White Gravy, Exactly?
This delicious and simple homemade white gravy only calls for five simple pantry staples, all of which you probably already have on hand.
- Flour
- Milk
- Butter
- Pepper and salt
Do you really think that’s everything you need to prepare this simple white gravy recipe? This means that compared to store-bought packets, this homemade white gravy is far more cost-effective. So you may indulge in some wonderful white gravy while also saving money. You also fully understand the ingredients you are employing.
How to Prepare White Gravy Using Milk and Flour?
- In the beginning, melt the butter in a medium saucepan over medium heat.
- The flour will then turn a light brown after being added and whisked into the melting butter.
- After combining the butter and flour, gradually stir in the milk until the mixture is smooth and creamy.
- Continue adding milk while whisking to remove any lumps from the flour mixture. Continuously stir while heating.
- Salt and pepper should be added.
- The gravy should then simmer for around 3 to 5 minutes, or until it reaches the desired consistency.
- Add extra milk if the gravy gets too thick. Depending on your preferred gravy consistency, you might need to add up to another cup of milk.
- Allow the gravy to simmer for an additional period of time if it’s too thin.
- After you’re done, you should taste your white sauce gravy and add additional salt if necessary. We prefer more sauce than most people do. More black pepper could be a good idea as well.
Enjoy the gravy right away while it’s still warm!
Actually, the preparation time is less than 10 minutes—more accurately, it is closer to 6 minutes. The next time you’re in the mood for some traditional white gravy, make your own to save money!
How to Store Gravy in an Airtight Container in the Refrigerator?
To preserve its freshness, store gravy in an airtight container inside your refrigerator. Gravy should be refrigerated within two hours after making it. The reason for keeping it refrigerated is because it’s a versatile sauce, and cold temperatures are best for preventing bacteria from growing. After you’ve served your gravy, store the remaining portion in a tightly sealed container in the refrigerator. While it will not last as long as the rest of your food, it can still be used within three to four months. First, you must make sure the container is airtight. You can use a freezer bag or an airtight container.
Gravy should be completely frozen before you freeze it, as the heat from the freezer will cause the sauce to expand. Once the container is airtight, you should seal it with a rubber band, labeled “gravy.” Then, freeze the container. To reheat gravy, you can use a heavy-bottomed skillet. This will allow you to control the temperature and stir the contents. Alternatively, you can use a pot as a double boiler. The double boiler method is safe to use, as the heat will ensure that the ingredients remain well mixed and won’t separate. To reheat the gravy, you can use a whisk to stir them.
Uses of White Gravy
There are various gravy varieties that you can offer. Everything depends on the main course you choose. Here are some of our preferred applications for White Gravy:
- Chicken Fried Steak
- Serve over Biscuits
- Mash Potatoes
- Pork Chops
- Fried Chicken
- Dipping sauce for your French Fries
- Hashbrowns
The possibilities are infinite, as you can see. Try it for lunch, dinner, or morning. We are confident that you will find the ingredients and recipe to be so simple that you can probably prepare them right away.
Variation Concepts
Here are a few ingredient swaps you can use if you don’t have everything you need for this recipe.
- If you run out of butter, bacon grease is a fantastic substitute. We adore making great sawmill gravy with bacon grease.
- Heavy whipping cream or half and half can be used with milk. A nice alternative if you need to avoid dairy is chicken stock.
- When we make sausage, we’ll crumble up a few pieces and add them to the white gravy.
Using Pan Drippings to Make Gravy
One of the simplest and most flavorful ways to make homemade gravy is by using pan drippings. You’ll need to carefully pour out the fat and gristle from the hot pan, and then strain it through a fine mesh strainer and into a measuring cup. To serve, you can pour the gravy over mashed potatoes or biscuits. This easy recipe is perfect for busy weeknights! Once you’ve strained the pan drippings, you can use the resulting gravy to top roast chicken, mashed potatoes, or biscuits.
For a more gourmet meal, you can serve the gravy over cooked chicken breasts, roast chicken, or biscuits. While the process is simple, you can also enhance the flavor with herbs, spices, and vinegar or wine. It will taste even better when served over roast chicken or baked chicken breasts. The drippings from roasting or frying chicken have a lot of flavors. They’re also full of good fat, so adding it to the gravy is the best way to enhance the flavor and smoothness of the finished product. You can use butter or renderings from roasted chicken for a meatier gravy. If you’re a vegetarian or vegan, use coconut oil instead.
Can you use Almond Milk as a Milk Substitute in the Gravy?
There are many benefits to using almond milk instead of cow’s milk in gravy. The nutty flavor is a good match for gravy, and it contains less sugar and fat than cow’s milk. You can even use it as a milk substitute for gravy if you wish. Here are a few tips for making vegan gravy. Try it out. You may even find that you love it! Although almond milk doesn’t taste as rich or creamy as regular cow’s milk gravy, it will be lower in calories.
That makes it acceptable for those who are allergic to dairy milk and those who love flavorful, rich dishes. Try it out today! Just make sure to follow the recipe and consult a nutritionist before making the change! You might even find it easier than you think! Using almond milk in gravy recipes is very simple. Just replace the cow’s milk with almond milk in the proportion of 3 tablespoons of almond milk to 2 cups of regular cow’s milk. Just make sure to watch it carefully to ensure that it does not burn. You might have to stir more often than usual, so be sure to check your recipe carefully before making the switch. You’ll be amazed at the results!
How much Cornstarch should be Added to the Gravy?
Producing a slurry (mix) of cornstarch and a small amount of cold liquid is the first step in making cornstarch gravy (generally water or broth). To thicken around 1 1/2 to 2 cups of gravy, you will need about 1 tablespoon of cornstarch. Avoid mixing hot liquids with powdered cornstarch because it will clump.
What Distinguishes White Gravy from Country Gravy?
White gravy and country gravy are two names for similar sauces that are frequently used interchangeably. Sometimes bacon grease is used in place of butter to make country gravy’s roux.
What is the Milk to Flour Ratio?
A good ratio is 1 cup milk (or water, or buttermilk) to every 2 cups of flour, but it’s not actually that crucial. As a side note, this experiment largely disproves the idea that you should prepare biscuits with cups and teaspoons rather than a scale.
Does Gravy Contain Milk and Flour?
White gravy, often known as country gravy, is produced using five staple ingredients. In this variation, a straightforward roux is made with flour and bacon fat to create a delightful nutty flavor. Your homemade country gravy will be incredibly smooth and creamy if you use room temperature milk and stir often.
Can Milk be Used to Make Gravy in Place of Water?
While brown gravy is created by combining beef liquid and drippings with water or broth, white gravy is usually produced with some form of a dairy product. Water can be used to produce gravy, but it won’t be white and won’t have the same thickness, flavor, or body as gravy prepared with milk.
How is Gravy Mix Made?
The majority of dry gravy mixes contain thickeners, flavorings, meat, vegetable, or yeast extracts, and are typically very salted. Water is added to the mixture, which is then heated until it thickens. These mixtures can occasionally be used to flavor and thicken casseroles or roasts.
Which is Preferable, Cornstarch or Flour, for Thickening?
Cornstarch has twice the thickening power of flour, which only contains a small amount of starch because it is pure starch. Therefore, to get the same thickening as cornstarch, twice as much flour is required. Cornstarch is first mixed with cold water to create a slurry, which is then used to thicken sauces.
Conclusion
Your family and you both will adore this simple and delectable white gravy dish, which is a standard in the United States. And given that it takes less than 15 minutes to prepare, we have a feeling you’ll be making it for your family on a regular basis going forward. Your family will constantly ask for this because of the simple ingredients and quick and simple preparation!